
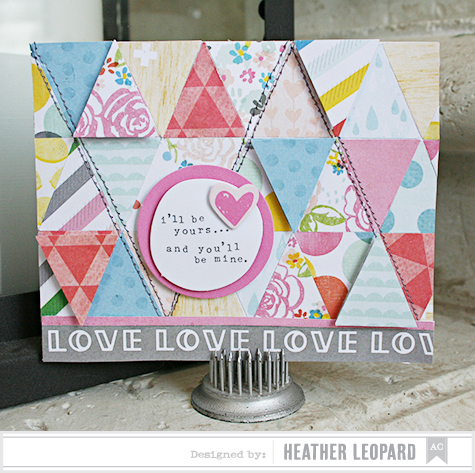
To create this, I cut a card base out of white cardstock and folded it in half. I cut a second base just large enough to cover the front.
I punched triangles, using my American Crafts Knock-out 1.5" Triangle punch. I mixed and matched the triangles and adhered them to the second base of the card in alternating directions. This is important if you plan to stitch on your cards.
I left an open strip at the bottom to add a sentiment, which was simply cut from the bottom of the paper, where they usually print the manufacturer and collection name. I also added a small pink strip to accentuate the border.
Then, I stitched two large triangles on the card, following the lines that were created from the smaller triangles.
I popped up more triangles over the stitched ones and added another sentiment.
Lastly, adhere the designed base to the card base and you have a fun little card (and your recipient won't see the stitching on the inside.
2 comments:
SUPER cute!!
This card is pretty!
Post a Comment