Showing posts with label Banners. Show all posts

Wednesday, June 19, 2013

Welcome Summer Banner

I've been dying to make a cute banner to hang from this old window I got for $3 at a garage sale. Apparently it came from a very old house, or was it a church? Yes, it was a church that was being redone in Galveston.  I just love the chipped paint, texture and look & feel of it. I see lots of fun crafts hanging from it in the future.

So that leads me to my first project to display on the window!  I'm still not sure if I'll hang it in or around the house so for now, it sits against the vine covered fence just outside my front door welcoming guests that stop by.

Welcome Summer Banner

I just received a fabulous package from Little Yellow Bicycle contain their NEW Vintage Summer collection and was immediately drawn to the Decorative Edge Cardstock so when Liz asked me to create a project using decorative edges, I pulled them out, wondering what to do with them.  I laid them out side by side to see which ones I liked the most and TA-DAAAAAA! A banner was born.  Of course, so many other possibilities popped into my head but I kept coming back to a banner.

I cut the letters to spell "welcome" using my CAMEO. I selected a dark, less patterny (is that even a word?) pattern to help it stand out from all the other patterns I knew I'd be adding them over.

I pulled out all the deco cardstock edges and just fell in love with the mix of large and small cardstock designs. I laid them all out again and only had to add the two large flag/pennant shaped pieces on each outer edge (from my 6x6 pad) to complete the word "welcome".

I stacked the small cardstock decorative edges over the large ones, added strips of papers over some of the decorative cardstock, layered on banners, rosettes and flowers from the paper crafting kit and then topped them with individual letters. I had to add a few sheets of paper behind some of the letters to help ensure they didn't blend into the background to much. The banner above the "C" is a lovely chipboard shape that fit over the card perfectly!

We are soo ready to welcome summer, which officially begins on Friday, even though it's been a scorcher here in Cypress (Texas) for the past month)!

Little Yellow Bicycle Supplies:
Vintage Summer Collection:VS-133 Decorative Edge Cardstock - 6.5" X 7.5' (10 pieces)VS-304 6X6 Paper Pack (24 sheets - 2 each of 12 designs)VS-279 Chipboard Shapes - with thermography (33 pieces)VS-220 Fabric Favorites (8 pieces)VS-305 Paper Crafting Kit (66 pieces)
Naturals Collection:
NA-JT10 Jute Pack - Light (4 colors, 72" each)

Let me know what you think in the comments below. 

Thanks for stopping by! Now go on and get crafty :)

Tuesday, May 1, 2012

Adorable and Oh So Charming & Blog Hop Winner

It was simply impossible to not include the My Mind's Eye Follow Your Heart "Be Happy" Adorable paper on your scrappy wishlist!  I just had to have it!!!  I mixed it with another MME Follow Your Heart line, "Be Amazing" and it paired up really well.  The golds in the Be Amazing collection were perfect for the carousel colors and the "Be Happy" paper with the Instagram picture windows worked awesomely. I loved it so much I used it for my A Bit of This & That class in April at Scrapp'n Savvy.
Supplies: My Mind's Eye Follow Your Heart "Be Happy" Adorable 12x12 Paper, "Be Amazing" 6x6 designer paper pad, "Be Amazing" Blue Doily 12x12 paper, "Be Amazing" decorative brads, "Be Amazing" chipboard, American Crafts Wow glitter paper in gold, Imaginisce i-top 2.0 and small brad daddy, Bazzill Tape Runner, Zig Black Pen.

I wish I could snap more pics of this layout because you can't see all the dimension but it's on display at my LSS.  Instead, I'll have to tell you about it - I cut out some of the Instagram windows and popped the photos back behind them. Other windows have coordinating paper or photos popped up over it. Lastly, some of the windows just have paper adhered to them. So, all in all, there are 3 levels of dimension from back to front.

Before I go today, I want to thank everyone for helping us celebrate Diana's blogiversary by hopping along with the talented gals I was lucky to be a part of.   Thanks to Random.Org, the lucky winner of the Amy Tangerine prize RAK on my hop is KRISTIN (a fellow Texan). Congrats!!! To claim your prize, shoot me an email no later than Tuesday, May 8, 2012 via the About | Contact Me tab at the top of the page.

Friday, March 30, 2012

A Bit of This & That - Scrappin' Savvy Blog Hop

Hello, hello! I don't think I've blogged in about a week but I certainly have been busy creating projects that I just haven't been able to share just yet.  That's why I'm excited to show you these layouts and also let you know about a little blog hop we are doing with my LSS, Scrapp'n Savvy, which I teach at. These layouts are a little sampler of some of the things you'll be creating if you attend one of my classes. 

First let me tell you about the blog hop and then stay tuned to hear about my classes. If you're not local, I hope these projects inspire you. 

Welcome to the Scrapp'n Savvy Blog Hop! During this hop, you will learn about each teachers classes at the store and be eligible to win FREE class sessions. To enter, you must leave a comment on EACH teachers' blog and then return to the Scrapp'n Savvy blog and leave a comment that you have completed the hop. We will also be sharing with you information about our classes and techniques and tips that we used to create our "HOME" banners!

My class is called A Little Bit of This & That. I call it that because it's like a box of chocolates - you never know what you're gonna get. That being said, it usually consists of a couple of layouts plus maybe a mini album or perhaps a card.

For April's class, we will be playing with My Mind's Eye Follow Your Heart "Be Amazing" collection and a bit of October Afternoon Farmhouse. We'll be doing one 1-page layout, one 2-page layout and a DIY (do-it-yourself) smash-like mini album. Here are the 1-page and 2-page layouts. The mini is still a secret but I think you'll love it.

Supplies are from my Scrapbook Circle Remember This kit, which is sold out but these items can be purchased at Scrappin' Savvy as well.  Supplies: My Mind's Eye Follow Your Heart Be Amazing collection: Societe, 6 x6 Designer Paper Pad, 12x12 chipboard, brads, Zig Marker in black.

The 1-page layout focuses on layering, fussy cutting to create handmade elements, stitching, dimension and more.

Here's a sneak at the 2-page layout. The actual layout will be at the Sampler event on Saturday. Techniques will include, distressing, misting, stitching (I used the new Sew Stamper tool) and will include a bit of layering. Are you starting to see a pattern? Yep, I'd say pretty much all of my layouts include a bit of each of those elements.

Not pictured from my April class is the DIY mini album.

For May, we'll be designing with Echo Park's Thise & That Charming collection. Similar to April's class, we'll be creating the 1-page and 2-page layout below plus a notepad booklet (great gift idea). The booklet is not pictured. Note: if you were here before I only posted a sneak because I had to hold it back for the Paper Issues blog hop but now I can post the full reveal.


Full page was revealed on April 1 so I updated this post to see the entire layout because there was soo much more to it that I couldn't show you!

So what do you see? Maybe a bit of mist, distressing, stitching and layered elements? You'll get to play with the Imaginisce i-top tool and the new Sew Stamper to make your faux stitches. The notepad booklet will be made from the same collection and if you like the style of the layout above, you won't be disappointed.

GIVEAWAY
This is for locals only (sorry). I'm giving away a spot in my April class. All you have to do is follow my blog and leave me a comment. I will do a random drawing on April 5. Either way, I hope to see you in my classes!
 
If you are attending the Sampler on Friday and Saturday you'll be making a fantastic "HOME" decor item. I will share my ideas for decorating it as soon as I get to create with mine.
 
Thanks for stopping by my blog today. Be sure to visit and comment on each of the blogs listed below for your chance to some scrappy goodies from Scrappin's Savvy, in addition to the free class I am giving away!


Scrappn’ Savvy Blog- http://www.razzilldazzilltime.blogspot.com/
Millie Jones- http://generationswithmillie.blogspot.com/
Audrey Yeager- http://www.audreysreflection.blogspot.com/
Heather Leopard- YOU ARE HERE!
Terri Burnette- http://thepaperassylum.blogspot.com/
Leslie Parlette- http://designsdessertdisasters.blogspot.com/

Thanks for stopping by today!

Friday, March 9, 2012

Field Notes Revisited

I had a great time guest designing for SEI last month! I didn't post full reveals each day over here so I thought I'd post them now.  First up is a 2-pager and a sketch I did.  Keeping to my promise to myself to do more 2-pagers, I like how it turned out.  So many times I get stuck in a two page rut of lining up a bunch of photos in a row across the page. I think this layout was a good break of that mold.
 Here's the sketch I created:
 I had fun with paint and mist with the goal to make the alphas pop using black splotches to match the ducks.

 Next up: two cards and a tutorial:


 Butterfly Mini Album
Pin It
  
Thanks for stopping by today! I can't wait to play with the other two new lines and the dye they sent me!
xoxo - Heather

Friday, February 24, 2012

Butterfly Mini Album - SEI Guest Blogger

I can't believe my week of hogging the SEI blog has come to an end.  I have one last project to share with you today.  Several years ago, my mom and I found a bunch of flower and butterfly chipboard mini albums at Michael's for $1. I bought several of them and gave them to friends.  When SEI sent me their new CHA collections, I remembered I the albums so I went into my stash of alterable items hoping I didn't give away all of them when I cleaned out my scrap room.  Of course, it was there because I keep everything. 

Here's a few peeks of the mini. 


To see each page, visit the SEI blog today.  And make sure to leave a comment for your chance to win the Field Notes collection.  

xoxo Heather

Tuesday, February 21, 2012

Nature's Adventure - SEI Guest Blogger

I am soooo excited to be guest blogging for SEI all week.  It actually started with an introduction post over there yesterday.  
They sent me their 3 new collections to play with and I've been having a blast creating with them this past week.  I immediately dug into the Field Notes collection because the butterflies and the foiling on the papers are gorgeous! 


My project today is actually a sketch and layout.  And it's not just any layout...if you know my history you know I love my single page layouts. I made it a goal this year to do more double pagers so I figured this would be a good time to start. 


I started out by drawing up this sketch and choosing this color combo:
Pin It

Here's a couple of sneak peeks of my layout.  Visit the SEI blog to see my layout in it's entirety as well as read my design notes. 


There's one more reason to head over to the SEI blog every day this week. By commenting on each day's post, you are entered to win a Field Notes collection. That's up to 5 entries for this!

So that’s it for today.  I hope you enjoy the sketch. If you use it please post a link to it here so I can visit your site and admire your work, even if it's several months from now!!!
Check back in tomorrow for some Pinterest inspiration.
xoxo Heather

Tuesday, February 7, 2012

My Slice of {Little Yellow Bicycle} Paradise

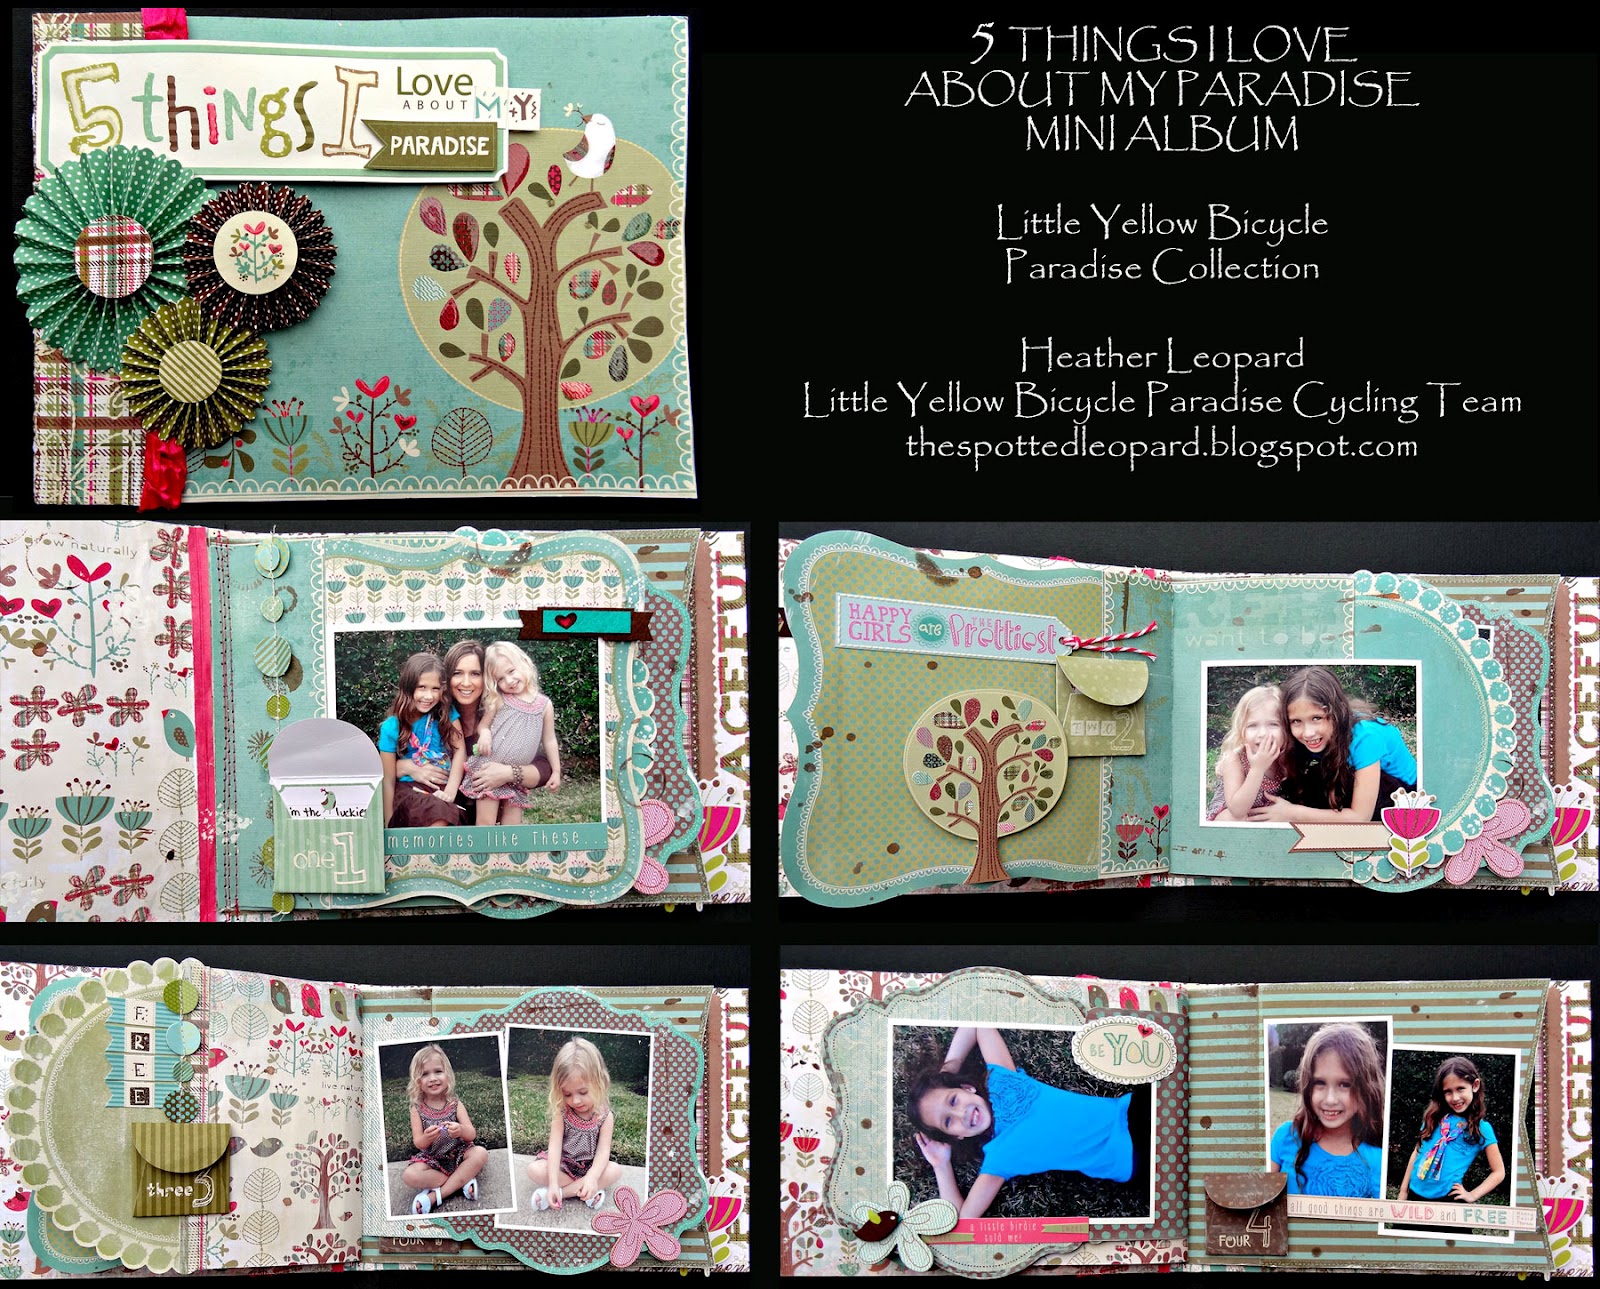
I am soo honored to be designing as a member of the Little Yellow Bicycle Paradise Cycling team.  When I saw the Paradise collection online all sorts of ideas came to mind and I was delighted to see how much more gorgeous it is in real life. Today I'm going to share a few layouts and a mini album, which I hope will inspire you. Beware, I've included lots of photos!

Sooo, the first thing I noticed when I pulled everything out were the die-cuts and I instantly realized how great they would be as a mini album.  I'll get to that in just a sec.  First, let me show you a few layouts I made.

For my first layout, I chose to use a photo of my daughter that is several years old. I'm not sure why I never scrapped it before but I'm glad because this is the perfect collection for it. Pin It


Supplies: American Crafts cardstock, Little Yellow Bicycle Paradise collection: PD-106 Happy Dots/All Natural, PD-108 Blissful Dots/Teal Tapestry, PD-133 6" x 6" Decorative Edge Double-sided Textured Cardstock - with glitter accents, PD-279 Chipboard Shapes - with glitter accents, PD-222 Felt Stickers - with glass beads, PD-305 Paper Flower Kit, PD-135 Cardstock Stickers - Favorite Pieces - with glitter accents, PD-140 Cardstock Stickers - Fresh Verse™ - with thermography and embossing, PD-1100 Tear Out Ticket Book - with thermography and embossing, Imaginisce i-top 2.0 and medium brad daddies, The Twinery twine, Zig Marker in Chocolate


I love to layer whenever possible.  I decided to triple layer my background but of course, I cut out the insides from the papers where they would be covered up so I could use them on another project. I distressed the edges just a bit and then machine stitched around the border.

Banners are still in-style and the "HAPPY" cardstock stickers did not dissapoint.
The paper flower kit is incredible.  I love the DIY rosettes, which come in 2 different sizes.  They add just the right touch to the layout.

My 2nd layout featured more banners, this time I cut them myself, using random widths and lengths and layering them over each other.  I also fussy cut a few of the papers, added some punch-work and then added a top and bottom "frame" to bring the layout together.
Pin It


Supplies:
American Crafts cardstock, American Crafts knock out border punch set, Little Yellow Bicycle Paradise collection: PD-109 Pleasant Plaid/Earthy Dots, PD-108 Blissful Dots/Teal Tapestry, PD-101 Paradise/Petite Pom Poms, PD-103 Simple Pleasures/Teal Too, PD-104 Splendid Stripe/Olive Leaves, PD-309 Confetti Garland - 30" long, Zig Marker in Chocolate


I did a zig-zag machine stitch over the banners at the top as well as on the main photo below to adhere them to the page and then topped them with garland for a litle bit of added flair. It's hard to tell in these photos but the circles are folded up randomly and I added a few smaller circles on top of the larger ones to make them even more interesting than they already are.

My last layout was taken last week as I caught my youngest daughter stopping to smell the roses.  She had  a very large velvet pen in her hand and she kept trying to smell it.  It was too adorable! This layout was made using leftover scraps after completing the other layouts and mini album.  I love that it pushed me to find creative uses for those odd shaped scraps.
Pin It

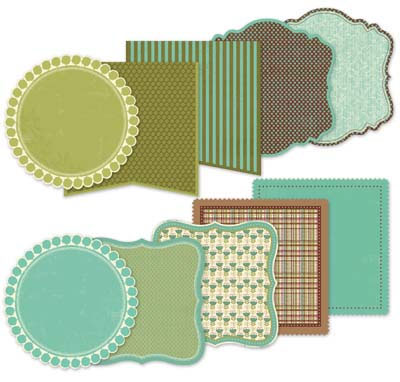
As promised, let's get back to the mini album.  Like I said, I saw the dies in their packaging and it just hit me how perfect they would work as-is for a mini.  Here's what they looked like in the packaging:

            
So the first thing I did was take them out of the packaging and cover the front and back of the actual packaging with pattern paper.  Here's how I started with the cover:
I then decorated the cover with cardstock stickers, DIY rosettes and Glossy Accents

Next I added coordinating paper to the dies, making sure to use a smaller width of paper for the first page, while adding more width to the next page and the next and so on so that the lengths of each page would get longer as they are added. Once I had all the base pages made, I stitched them together with my sewing machine, added mist and gesso and then added pictures and embellishments.  Here are the end result pages:
Pin It

 I just LOVE the little journaling pockets!


Supplies:

Little Yellow Bicycle Paradise collection: PD-133 6" x 6" Decorative Edge Double-sided Textured Cardstock - with glitter accents, PD-222 Felt Stickers - with glass beads, PD-230 Clear Cut Shapes, PD-308 5 Things Envelopes - self adhesive with embossing, PD-309 Confetti Garland, PD-140 Cardstock Stickers - Fresh Verse™ - with thermography and embossing, PD-279 Chipboard Shapes - with glitter accents  


Well I guess I hogged your time long enough. I hope you enjoyed browsing through my creations as much as I enjoyed playing with this new collection.  Be sure to stop by the Little Yellow Bicycle blog today and leave me some love over there too! xoxo Heather