Both of my DT reveals fall on the same day this week.
Reveal #1: Sketchabilities - All Ears. After a long day at Magic Kindom at Disney World, Rheagan was worn out but she was still in great spirits as we headed out of the park. She was proudly showing off her "big ears" but you can tell through her forced smile that she was tired. She's still as cute as can be though.
My 2nd reveal is actually my last reveal for Nuts About Sketches. :( I did not try out for a 2nd term but I really enjoyed working with Shawn and her sketches.
Reveal #2 xx crossing fingers xx
This layout was to much fun. I doodled the border along the edge freestyle. I wanted the outer blue border to look like watercoloring so I watered down some re-inker and then painted it on several times to get some color variance. Then I fussy cut the butterflies in coordinating paper. The journaling is hidden behind the red photo section. The big red flower at the bottom right is actually what pulls the journaling out (see below). What is really hard to see here is ALL.THE.STICKLES. that I applied to this layout. I stickled: the edge of each butterfly, all the dots and lines and circles within the butterflies, the edges of the brackets, the edges of the layout, the big red flower, and the doodled loops on the layout and journaling tag. I am sure I forgot something that got hit by the stickle bug ;)
Monday, August 30, 2010
Wednesday, August 25, 2010
Sketchabilities is Turning One!!!!
Sketchabilities will be celebrating it's 1st birthday in September. First I have to say congratulations to Karan for a great blog and even better sketches! I am so excited about this celebration. We've got some fun things planned so check back here but more importantly, visit the Sketchabilities blog in the next week or two to learn more about the guest designers, awesome sponsor giveaways, blog hops and more. I will be doing a giveaway here on my blog so keep an eye out for that! More details coming soon!
Monday, August 16, 2010
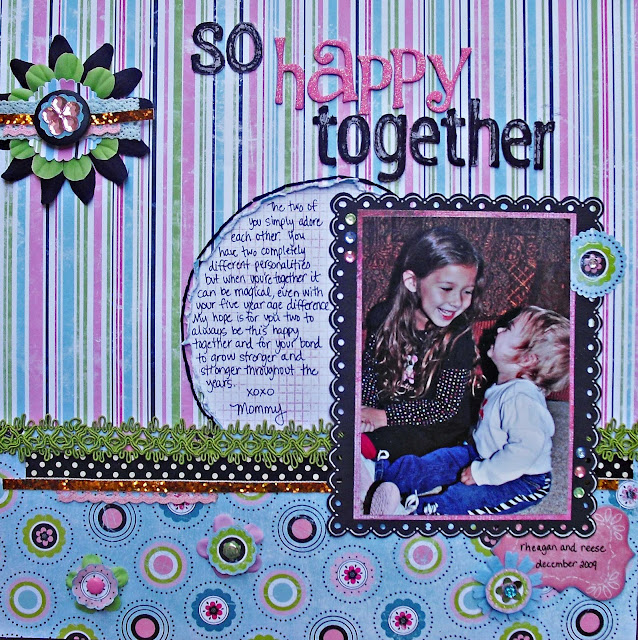
So Happy Together
It makes me so happy to see how much my girls really adore each other. I was so excited when I caught this moment of them together last December.
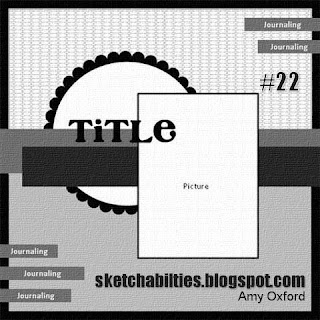
This week's Sketchabilities sketch by Amy was perfect for this moment. It's hard to see the details in the photo but there's paper shredding, stamping, doodling, punching, liquid glass, sanding - I sanded down white letters and them inked them black to give them a distressed look, like the paper. I sanded the brands to also give them a distressed look. I cut a circle out for the journaling spot and then sanded the edge and stitched around it. Then I added a different background paper, which I stamped to give it the pink grid look for my journaling.
This week's Sketchabilities sketch by Amy was perfect for this moment. It's hard to see the details in the photo but there's paper shredding, stamping, doodling, punching, liquid glass, sanding - I sanded down white letters and them inked them black to give them a distressed look, like the paper. I sanded the brands to also give them a distressed look. I cut a circle out for the journaling spot and then sanded the edge and stitched around it. Then I added a different background paper, which I stamped to give it the pink grid look for my journaling.
Tuesday, August 10, 2010
Pleated Sea Shell Tutorial
If you've been reading my blog you know that if I can't find what I'm looking for I will make it myself. Even though I'm an only child, I do like to share (sometimes). So, I'm sharing how I made the pleated sea shells with you. Here's my step by step instructions.
Step 1: Cut a rectangle the size you think will work for you.
Step 4: Make small pleats (start and stop the pleat so the paper is folded down)
Step 5: Cut a small cut in the middle of the pleated area (I cut mine about 1/2" up from the bottom) and fold one side up
Step 6: Fold up other side
Step 7: Fan out at top and attach to layout or card. This is where you can tie it, glue it or do what you want to make it look like a shell.
Monday, August 9, 2010
Making Waves Wherever You Go
This layout, based on this week's Nuts About Sketches sketch, is more than what you see. It represents a little girl's passion for the sea life in the Gulf of Mexico as a result of the devastating oil spill. Rheagan was sad when we told her the water may have oil in it and we wouldn't be able to swim but her attention quickly turned to all the sea life and who would help them. Once we got to the beach, we were happy to see that the beach and Gulf didn't have any tar. We had a great day at the beach.
Check out my tutorial on how I made the seashells.
Check out my tutorial on how I made the seashells.
Nuts About Sketches Sketch:
Monday, August 2, 2010
Flock of Seagulls
I took a little more liberty with this Nuts About Sketches sketch than usual. I had a couple of events that had multiple photos but just couldn't get them to work the way I envisioned so I went with a recent trip to the beach that had fewer photos. There are 4; can you spot photo #4? As you look at the sketch, hopefully you can see that I did the left side of the spread using the top 3 photos, the title on the left, I turned the 6x5 photo into a background for the 3 photos and added the border at the bottom third. As I was thinking about journaling options I went to a few of my favorite blogs for inspiration and remembered a layout that my IRL friend did a while back that I loved. I don't know if I scraplifted it subliminally or what but as I looked at the background patterned paper and border, it's almost identical so what the heck, I did a similar journal spot and titling. I was going to angle the photos where they would overlap a little bit but I really liked how Audrey did hers. Thanks for the inspiration, Audrey. 

BTW, I am going to go back and scrap one more photo I took during this feeding frenzy moment, which was of Reese's daddy holding a cracker up with his hand while a seagull swooped in and ate it. This was after Reese had attracted him so I didn't want it to take away from Reese's seagull moment therefor I didn't want to include it on the layout above. Reese was standing next to him so it will tie in nicely. I think I will use the right side of the sketch for that.
Subscribe to:
Comments (Atom)


