Tuesday, May 8, 2018

Basic Supplies for New Scrapbookers | Beginner Scrapbooking Series

Hi everyone. I was recently asked by someone wanting to start scrapbooking what supplies were needed. I put together a list and want to share it with others because I'm thinking there's more than one person out there wondering how to get started.  If you're a scrapbooker already, I'd love to hear what your basic supply list includes.

I'm going to make this into a blog as well as YouTube series, which will include:
  • Scrapbooking 101 so to speak for those looking for the basic supplies, the design elements of scrapbooking, where to go for inspiration more.
  • Intermediate and Advanced Scrapbooking for those looking to go beyond the basics - playing with mixed media, ink, die cut machines, sewing...
Stay tuned.  For now, let's chat about the basic supplies needed to start scrapbooking...

Basic Supplies for New Scrapbookers

  • Fiskars paper trimmer: I included two below. Look for the one that does not have the wire so it's hassle free! I love mine because I get a precise cut every single time. 
  • Tonic scissors: I've had mine for over 5 years now and they are still shrap!  Also, nothing sticks to these and they don't make my hand cramp when I'm fussy cutting.
  • Tape Runner Adhesive: I use the Sticky Thumbs tape runner as well as the Scotch ATG, which is larger than your average tape runner. I recently switched to the ATG tape runner for two reasons - you don't have to refill the tape as often so it lowers the cost and second, the adhesive on several of my older layouts stopped sticking and my photos and papers came apart. I asked around and this had rave reviews from trusted scrappers!
  • Double Sided Tape: Another great options for tape runner.  Works well with metals, wood veneer, and more.
  • Liquid Adhesive: This is one of several that I used.  I find that the glue settles nicely and doesn't leave visible lumps when I glue things together.
  • Glue Dots: these are a must have for every scrapbooker and card maker. The perfect amount of adhesive for small, individual embellishments.
  • Dimensional Foam Dots: don't scrapbook without these!  These allow you to add a pop of dimension to your scrapbook layouts!  Selectively place them under photos, paper, embellishments to make things stand out on the page.
  • White 12"x12" textured cardstock: this is my go-to staple that I use as the foundation for most of my pages.  
  • Black .03 pen: for journaling and doodling.
  • Patterned paper collection - search Pink Paislee, American Crafts, Pebbles, Elle's Studio for the latest collections.  They release new collections every few months.
  • Embellishments such as stickers, chipboard, die cuts (ephemera) that coordinate with the collection
  • Thickers alphabet chipboard: these are great for titles!
Here are some places I like to shop. I thought I'd give you variety. I've included affiliate links to Scrapbook.com as well as Amazon. You don't pay more for the products but I do receive a small % of the sale.

Scrapbook.com
Scroll through to see each item offered from Scrapbook.com


Amazon
Fast, free shipping for Prime members

Looking for scrapbooking inspiration?

Explore my blog for scrapbooking ideas, sketches, which are a great starting point for all layouts and free cut files if you already have a die cut machine.

Visit my YouTube channel to watch scrapbooking process videos - watch me as I create layouts and talk through my process for each one.

GIVEAWAY: I'm doing a giveaway to scrapbook.com over on my YouTube channel.  Simply subscribe to my channel and leave a comment on the video #13: iNSD Go. See. Do. You have until end of day 5/13/18 to enter.

Monday, April 30, 2018

Day to Remember Scrapbooking Layout

Hi everyone! I'm here with a scrapbooking layout using the new Elle's Studio Title Builder Vol. 2 Stamp and the Noteworthy collection. This project can be easily recreated by stamping on patterned paper or cardstock but I chose to dabble in a bit of mixed media to create something different.


I knew I wanted to mix stamped words from the awesome new Title Builder Vol. 2 Stamp with some of the words from pattern #3 in the Noteworthy 12″ x 12″ Paper Collection. I also knew that I wanted to create a super long title about spending family time together. What I didn’t know was what photo I wanted to use. That said, I have tons to choose from so I knew it wouldn’t be too hard, so I created this layout completely based on the structure for the title. That’s kind of scary but also kind of fun to start with a title!


There’s a lot of awesome words included on the Noteworthy patterned paper #3 and I wasn’t sure which ones I wanted to use but I knew I wanted to cut them out. I also knew I didn’t want to cut them all out by hand so I used my Silhouette and the PixScan to cut practically all the words out. I think that was a bit of pro-scrap-tination, if you you know what I mean. While the words were cutting, I decided to play with gesso and mists to create some colorful backgrounds to stamp on. I wanted a watercolor effect so I played around with 5 colors. Once dried, I had to figure out what I wanted to say in the title. I ended up choosing three phrases and I stamped the same words from the Title Builder Vol. 2 Stamp over each color, to have a variety of colors to choose from for each word. Once I had all the words cut out from both the patterned paper and the stamped words, I lined them up against the left side of the paper, adding a patterned paper strip from the Live Laugh Love 6″ x 6″ Paper Stack between the phrases. I also stitched over the words to secure them down.


I decided to scrap a photo we took together on a recent trip to the dude ranch. We went on long horse rides in the Texas hill country several times a day and had a great time together doing all the activities the ranch offered. I decided to keep the layering behind the photo light and instead anchored it with a long patterned paper to even the page out. I also chose to add a couple of embellishments, like the Noteworthy Wood Veneer, Noteworthy Puffy Stickers and Noteworthy Epoxy Stickers over and around it to draw the eye around.


I still need to add journaling under the “highlights” Noteworthy Word Label. There’s so much to say about this experience and I still need to put my thoughts together.

Thanks so much for stopping by today. If you’d like to see how this came together, check out my YouTube channel!

Friday, April 27, 2018

Spring Fling Cards

Hi everyone, I'm here today with some Spring Fling cards. You know they say April showers bring May flowers and that goes for cards too!
Spring Cards by @HeatherLeopard using @pebblesinc #patioparty collection #madewithpebbles #spring #cards #flowercards
These cards are quick and easy to pull together and can be used for practically any occasion.  I’ll walk you through each of them individually.
Spring Cards by @HeatherLeopard using @pebblesinc #patioparty collection #madewithpebbles #spring #cards #flowercards
This card is inspired by the dimensional sticker die cuts.  I was looking at them in the packaging while I was trying to come up with a design and I put them down for a second. Well I just happened to place them down on the card base and when I came back, I noticed that they fit perfectly on the card.  I simply cut the white and gold paper 3.5″ long x 4″ wide, 1/4″ x 4″ of the gold and then 1 1/4″ x 4″ of the blue to cover the base of the card, leaving a white border at the top and the bottom.
Spring Cards by @HeatherLeopard using @pebblesinc #patioparty collection #madewithpebbles #spring #cards #flowercards
Then I placed the dimensional stickers on top of the white and gold dots just as they were in the package.  Next, I added the gold strip.
Spring Cards by @HeatherLeopard using @pebblesinc #patioparty collection #madewithpebbles #spring #cards #flowercards
To complete the card, I added the blue patterned paper to the bottom and the gold hello puffy sentiment.  So easy and yet so adorable!
Spring Cards by @HeatherLeopard using @pebblesinc #patioparty collection #madewithpebbles #spring #cards #flowercards
My 2nd card has the same background as the first – I just love the gold and white dots. This card features a patterned paper backed die cut (from Paige Evans) and another puffy sticker sentiment.
Spring Cards by @HeatherLeopard using @pebblesinc #patioparty collection #madewithpebbles #spring #cards #flowercards
This card took a little more time and effort to create but it was worth it in my opinion.  I hadn’t planned to create something so detailed but I had an extra die cut leftover from this THIS floral wreath scrapbooking layout and it was sitting next to my desk. I noticed it as I was looking through my supplies and it happened to be a perfect fit for the card.  I used patterned paper scraps leftover from that same floral wreath layout to back my die cut.  I used anything green for the leaves and anything pink and yellow for the flowers.  I simply glued the patterned paper to the die cut in little pieces – one smaller piece for each leaf, for example. Then I just trimmed around the die cut.  You can kind of see it in some of the areas above.  The weird thing is you can see them in the photo but I don’t see it when I look at the card.  So strange.
Spring Cards by @HeatherLeopard using @pebblesinc #patioparty collection #madewithpebbles #spring #cards #flowercards
One I had the die cut complete, I used glue to apply it to the card and used foam dots to make parts of it pop. Then I tucked in a flower under the die and applied a puffy sticker sentiment.
I hope these spring fling cards bring a smile to your face and you are able to get out and enjoy the flowers!
Thanks so much for stopping by today.
xoxo, Heather
YouTube | Blog | Instagram | Pinterest

Thursday, April 26, 2018

Hello darling butterfly scrapbooking process video

Hi everyone. I'm here today with a process video I created for the butterfly scrapbooking layout that can be completed in 45 minutes if you have the right tools and can work fast.

Once you get the patio party collection in your hands, or any other supplies you'd like, you can follow along with me to create this fun layout.

I sped up the time so you don't have to sit and watch me for 45 minutes.  Remember: don't overthink this, you too can re-create this in under an hour, maybe even 30 minutes if you don't have any interruptions.


Here's a reminder of what the final layout looks like. 

Butterfly scrapbooking layout andprocessvideo by @heatherleopard using @pebblesinc #jenhadfield #patioparty collection #madewithpebbles

You can shop these product using my affiliate links below: Pebble Patio Party paper and embellishments at Scrapbook.com http://shrsl.com/szbx (full list below) Thickers Foil Foam Letter Stickers (Pebbles - Night Night Collection) http://shrsl.com/szck Sticky Thumb Adhesive Foam Dots http://shrsl.com/szcb Textured Cardstock White (71081) Silhouette CAMEO 3 http://amzn.to/2HJhjjX Cricut Maker http://amzn.to/2ooYvhL Cricut Explore Air 2 http://amzn.to/2GIjtyO *You don't pay extra for using these links, but I get a percentage of your sale. Thanks for your support! Patio Party supplies used: Patio Party Just for You (932903) Patio Party Backyard Blooms (932904) Patio Party Tulips (932905) Patio Party Scattered Posies (932906) Patio Party Summer Dreams (732907) Patio Party Shady Spot (932910) Patio Party From Me To You (732960) Patio Party Bouquets (732961) Patio Party Flutterflies (732965) Patio Party Slices (932967) Patio Party Wandering Wildflowers (732968) Patio Party Breezy (933050) Patio Party Butterfly Stickers (733053) Patio Party Puffy Stickers (733783)


Wednesday, April 25, 2018

Hello darling butterfly scrapbooking layout and process video

Hi everyone. I'm here today with a butterfly scrapbooking layout that can be completed in 45 minutes if you have the right tools and can work fast.

To help you along the way, I've documented the process in a video, which I will post tomorrow so be sure to check back..

Once you get the patio party collection in your hands, or any other supplies you'd like, you can follow along with me to create this fun layout.

Butterfly scrapbooking layout andprocessvideo by @heatherleopard using @pebblesinc #jenhadfield #patioparty collection #madewithpebbles

Paper piecing - 12 minutes

Butterfly scrapbooking layout andprocessvideo by @heatherleopard using @pebblesinc #jenhadfield #patioparty collection #madewithpebbles

To get started, cut a supersized butterfly using your electronic cutting machine. Peel the butterfly from the mat and also save the larger bits you cut out to use as templates for filling in the holes with patterned paper. Next, choose 5 - 7 coordinating patterned papers. This is where you could spend too much time overthinking things. DO NOT overthink the pattern placement. If you are working with papers within the same collection, chances are they will look good next to each other. Just pick up a paper and get started.

Starting at the top, select the template you reserved from the butterfly. Place it over your patterned paper and cut around it, leaving just enough edge around the perimeter - maybe 1/8" or 1/4" inch. It just really depends on the design. Once you've cut that out, discard the template and adhere the patterned paper to the back of the butterfly. You should have a perfect or near perfect fit. Repeat until all spaces are filled.

Secure the butterfly to the page, machine stitching down the center and adhering the left patterned paper side with foam dots.

Butterfly clustering - 12 minutes

Butterfly scrapbooking layout andprocessvideo by @heatherleopard using @pebblesinc #jenhadfield #patioparty collection #madewithpebbles

Next, you are going to add flower and butterfly embellishments to the top of the other side. Make sure you save space for your photo (I used a 3"x3" inch photo. I adhered my photo using foam dots and then filled in around it, adding flowers and butterflies. Once that was complete, I moved along the butterfly, adding flowers and butterflies along the edge of the butterfly and working inward to fill in all the spaces. I adhered some directly to the paper with liquid glue and I popped others up using foam dots. I worked this pretty fast to fill in all the spaces.

Add the finishing touch - 6 minutes

Butterfly scrapbooking layout andprocessvideo by @heatherleopard using @pebblesinc #jenhadfield #patioparty collection #madewithpebbles

In the time remaining, you just need to add a title, a cluster or flowers / butterflies on the patterned paper wing and around the title and journaling.

Craft along with me

Check back tomorrow to watch the process video I created for this butterfly scrapbooking layout.  I sped up the time so you don't have to sit and watch me for 45 minutes.  Remember: don't overthink this, you too can re-create this in under an hour, maybe even 30 minutes if you don't have any interruptions.

Thursday, March 8, 2018

Stars and stripes scrapbooking process video

Hi everyone, I'm back today with a scrapbooking process video for the stars and stripes scrapbooking layout I featured on the blog yesterday, also shown below.

Join me as I walk through the creation of this layout, detailing everything step-by-step. I'll also share a few tips you can use on any layout. Just remember...while I created this shooting star / Patriotic layout documenting our day at the beach celebrating the 4th of July, you could use the cut file for countless other themes - baby, stargazing, and so much more.


Get the full list of supplies needed below and download the Shooting Star cut file I created HERE.

Stars and Stripes Scrapbooking Layout and Process Video by @heatherleopard using the @pebblesinc #LandThatILove collection #madewithpebbles #heatherleopard #fourthofjuly #patriotic #scrapbooking #scrapbook #starsandstripes #4thofjuly

Thanks for stopping by today.
xoxo, Heather
YouTube | Instagram  |  Pinterest

You can shop these product using my affiliate links below:

Pebbles Land That I Love paper and embellishments (full list below) at Scrapbook.com

Sticky Thumb Adhesive Foam Dots http://shrsl.com/szcb

Textured Cardstock White (71081)

Silhouette CAMEO 3 http://amzn.to/2HJhjjX
Cricut Maker http://amzn.to/2ooYvhL
Cricut Explore Air 2 http://amzn.to/2GIjtyO

*You don't pay extra for using these links, but I get a percentage of your sale. Thanks for your support!

Land That I Love Products:
Land That I Love Land That I Love Patterned Paper
Land That I Love Boom Sparkle Pop Patterned Paper
Land That I Love America Patterned Paper
Land That I Love Oh! The Place We Go! Patterned Paper
Land That I Love Fireworks Patterned Paper
Land That I Love United We StandPatterned Paper
Land That I Love Patriotic Blooms Patterned Paper
Land That I Love Thickers
Land That I Love Icons and Accents Stickers
Land That I Love Ephemera
Land That I Love Red, White, and Blue Dots Puffy Stickers
Land That I Love Rub-ons

Wednesday, March 7, 2018

Stars and Stripes Scrapbooking Layout

Hi everyone, I am here today with a stars and stripes scrapbooking layout using the Land that I Love collection.  Y'all, I'm not usually one for red, white and blue collections but this one is is truly great!  Come take a look at what I created and then come back tomorrow - I'll be posting the process video I created for this layout. Stars and Stripes Scrapbooking Layout and Process Video by @heatherleopard using the @pebblesinc #LandThatILove collection #madewithpebbles #heatherleopard #fourthofjuly #patriotic #scrapbooking #scrapbook #starsandstripes #4thofjuly

I snapped these photos of my girls last summer, while we were celebrating the fourth of July in beautiful Hawaii.  We had a great day of fun in the sun and then that night, we caught a parade and watched the fireworks beach side in Kona.  It was a wonderful way to celebrate!

Gather your supplies

Select 6 - 7 patterned papers that coordinate White cardstock Embellishments Thickers for a title Large star template or you can download the Shooting Star cut file I created HERE

Making the Cut

Stars and Stripes Scrapbooking Layout and Process Video by @heatherleopard using the @pebblesinc #LandThatILove collection #madewithpebbles #heatherleopard #fourthofjuly #patriotic #scrapbooking #scrapbook #starsandstripes #4thofjuly

Cut 3 supersized star outlines, smaller stars and the curved strip for the shooting star part of the design.  Keep the inside portions of the stars. We will use one of them, or you may choose a different pattern like I did, for the center of the star part of the layout.

Assemble the page

Stars and Stripes Scrapbooking Layout and Process Video by @heatherleopard using the @pebblesinc #LandThatILove collection #madewithpebbles #heatherleopard #fourthofjuly #patriotic #scrapbooking #scrapbook #starsandstripes #4thofjuly

Lay the stars on the page overlapping each other.  Once you like the placement of them, pick them up and staple them together so they're secure. Next, spray blue mist and just a tad of the red mist on the white cardstock.  Once dry, place the stars back down and then using a pencil, lightly make a mark on the white cardstock in a star pattern.  Set the stapled star aside and machine stitch a star on the background paper.  I stitched the star three times to make sure it would really show up. Stars and Stripes Scrapbooking Layout and Process Video by @heatherleopard using the @pebblesinc #LandThatILove collection #madewithpebbles #heatherleopard #fourthofjuly #patriotic #scrapbooking #scrapbook #starsandstripes #4thofjuly

Now it's time to add the shooting star trail to the background.  Postition them so they appear to be coming out of the stars.  Stitch these down with your sewing machine. Now you can add the stars back, and adhere them this time!

Finishing touch

Stars and Stripes Scrapbooking Layout and Process Video by @heatherleopard using the @pebblesinc #LandThatILove collection #madewithpebbles #heatherleopard #fourthofjuly #patriotic #scrapbooking #scrapbook #starsandstripes #4thofjuly

I added layers behind the photo and adhered them over the stars using foam dots and then sprinkled additional stars from the cut file (some adhered flat and pothers popped up), the Tickers sheet and the puffy stickers.  Then and only then did I realize I hadn't added a title yet.  Luckily, I was able to add the first part of the title above the star and the 2nd part below the photo.  Phew!  I reserved room for journaling  under all the pointy parts of the star there.

Check back tomorrow for a process video I created for this stars and stripes scrapbooking layout. In the meantime, I hope you'll download my cut file and share your projects with me here on the blog or social media. 

Thanks for stopping by today. xoxo, Heather YouTube | Instagram  |  Pinterest

Wednesday, February 14, 2018

Valentine's Day Letterboard Love | Forever My Always

Happy Galentine's Day, friends!  I'm loving my new letterboard! It's seriously awesome and perfect for a little Valentine's "XOXO"!

Letterboard Love Forever my Always Letterboard by Heather Leopard using  DCWV letterboard  for @pebblesinc using @homebydcwv #letterboard #forevermyalways #xoxo #DIY
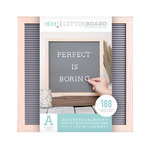
Die Cuts with a View - Letter Board - Oak Frame with Gray - 12 x 12
Product links contained in this post may include affiliate links. You don't pay any extra, but I get a small percentage of your sale. Thank you!

I couldn't wait to open my box to see what surprise we had in store for us from DCWV. I am oh so thankful to get this.  I mean, really, with a few alphas and the fun letterboard embellishments, the possibilities are nearly endless.

Check out my haul


Letterboard Love Forever my Always Letterboard by Heather Leopard using  DCWV letterboard  for @pebblesinc using @homebydcwv #letterboard #forevermyalways #xoxo #DIY


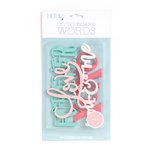
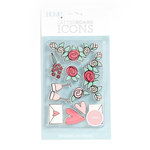
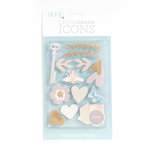
I was elated to find home, birthday and love themed goodness so I was set but have you seen the other letterboard embellishments? They are awesome!


Forever my always

Letterboard Love Forever my Always Letterboard by Heather Leopard using  DCWV letterboard  for @pebblesinc using @homebydcwv #letterboard #forevermyalways #xoxo #DIY

After I tore apart each package and sorted them into some plastic bins to get organized, I kept getting drawn to the Love theme.  I seriously think it was because I I was in love with everything I got but anyway, I decided on the quote, "You will forever be my always" - author unknown. I started placing each letter but I noticed some of the letters still had pieces of plastic where they were previously connected so I pulled out my trusting crafting files.

Letterboard Love Forever my Always Letterboard by Heather Leopard using  DCWV letterboard  for @pebblesinc using @homebydcwv #letterboard #forevermyalways #xoxo #DIY

I just filed those little bits away, with a little help from my daughter. I really don't think anyone but me would have noticed but it's much better now.

Letterboard Love Forever my Always Letterboard by Heather Leopard using  DCWV letterboard  for @pebblesinc using @homebydcwv #letterboard #forevermyalways #xoxo #DIY

I have to say, I've had letterboards before but I love how big these are and the materials they used but my favorite things are the incredible mix of alphas and embellishments.  The embellishments add the perfect finishing touch.

Shop these products

Product links contained in this post may include affiliate links. You don't pay any extra, but I get a small percentage of your sale. Thank you!

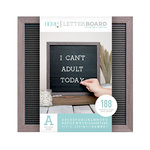
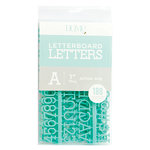
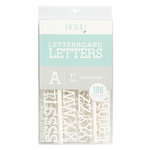
Die Cuts with a View - Letter Board - Oak Frame with Gray - 12 x 12 Die Cuts with a View - Letter Board - Silver Walnut Frame with Black - 12 x 12 Die Cuts with a View - Letter Board - Letter Packs - 1 Inch - Teal Die Cuts with a View - Letter Board - Letter Packs - 1 Inch - White Die Cuts with a View - Letter Board - Word Packs - Love Die Cuts with a View - Letter Board - Icon Packs - Love Die Cuts with a View - Letter Board - Icon Packs - Home
Thanks for stopping by today.
xoxo, Heather
YouTube | Instagram  |  Pinterest