Thursday, February 9, 2012

What I Love About My Family Mini Album

We are celebrating "Love" over on the Imaginisce blog this week.  They asked me to create a mini album and at first I was going to do a hubby love album, then a coupon book for the hubs, then a coupon book for the kids but I finally landed on creating something that I could use to capture what I love about each family member. 

Apparently I am on a kick right now of re-purposing packaging materials. First it was the red packaging that I used on the Friends Make the Best Accessories card for Imaginisce, then it was the die-cut packaging from the Little Yellow Bicycle Paradise Cycling Team loot and now I am using the packaging from the Imaginisce Sole Sisters chipboard stickers.  I used the same technique as I did for the LYB mini I posted HERE on Tuesday but this time I added a journaling prompt - "what i love about you".

I've made a FREE DOWNLOADABLE TEMPLATE for you to use if you wish to use my journaling prompt on a layout, mini or anything else.  Here's what I created with it.
Pin It

 Supplies: Imaginisce Sole Sisters Collection; Imaginisce i-rock and black glam rocks; Journaling Prompt by Me - Yours Truly.

Here's a couple of the girl pages up close

Here's how I created this mini:
  1. I printed my journaling template on 8.5x12 white cardstock.
  2. I stacked my 5 pages on top of each other and trimmed away each edge so that the last page would cover the length of the packaging (approx 11") and each one that I laid on top of the other would be shorter so I could easily flip through the pages.
  3. Once I lined them up how I wanted them, I added a cover (black houndstooth) and then folded over the top flap of the packaging, covered it with the pretty flower stem paper and stitched it all together with my sewing machine.
  4. Next, I added my photos and used papers that best suited the personality of each family member. 
  5. Now all I have to do is figure out what I love about them. I'll just make something up if I can't think of anything.  Just kidding. They are my world and I am sure I will run out of room with all I will want to write.
Okay, so click HERE to download of my journaling template. I hope you enjoy creating with it.  Oh and make sure to visit the Imaginisce blog. They have a couple of giveaways going on this week. Thanks for stopping by today.

Tuesday, February 7, 2012

My Slice of {Little Yellow Bicycle} Paradise

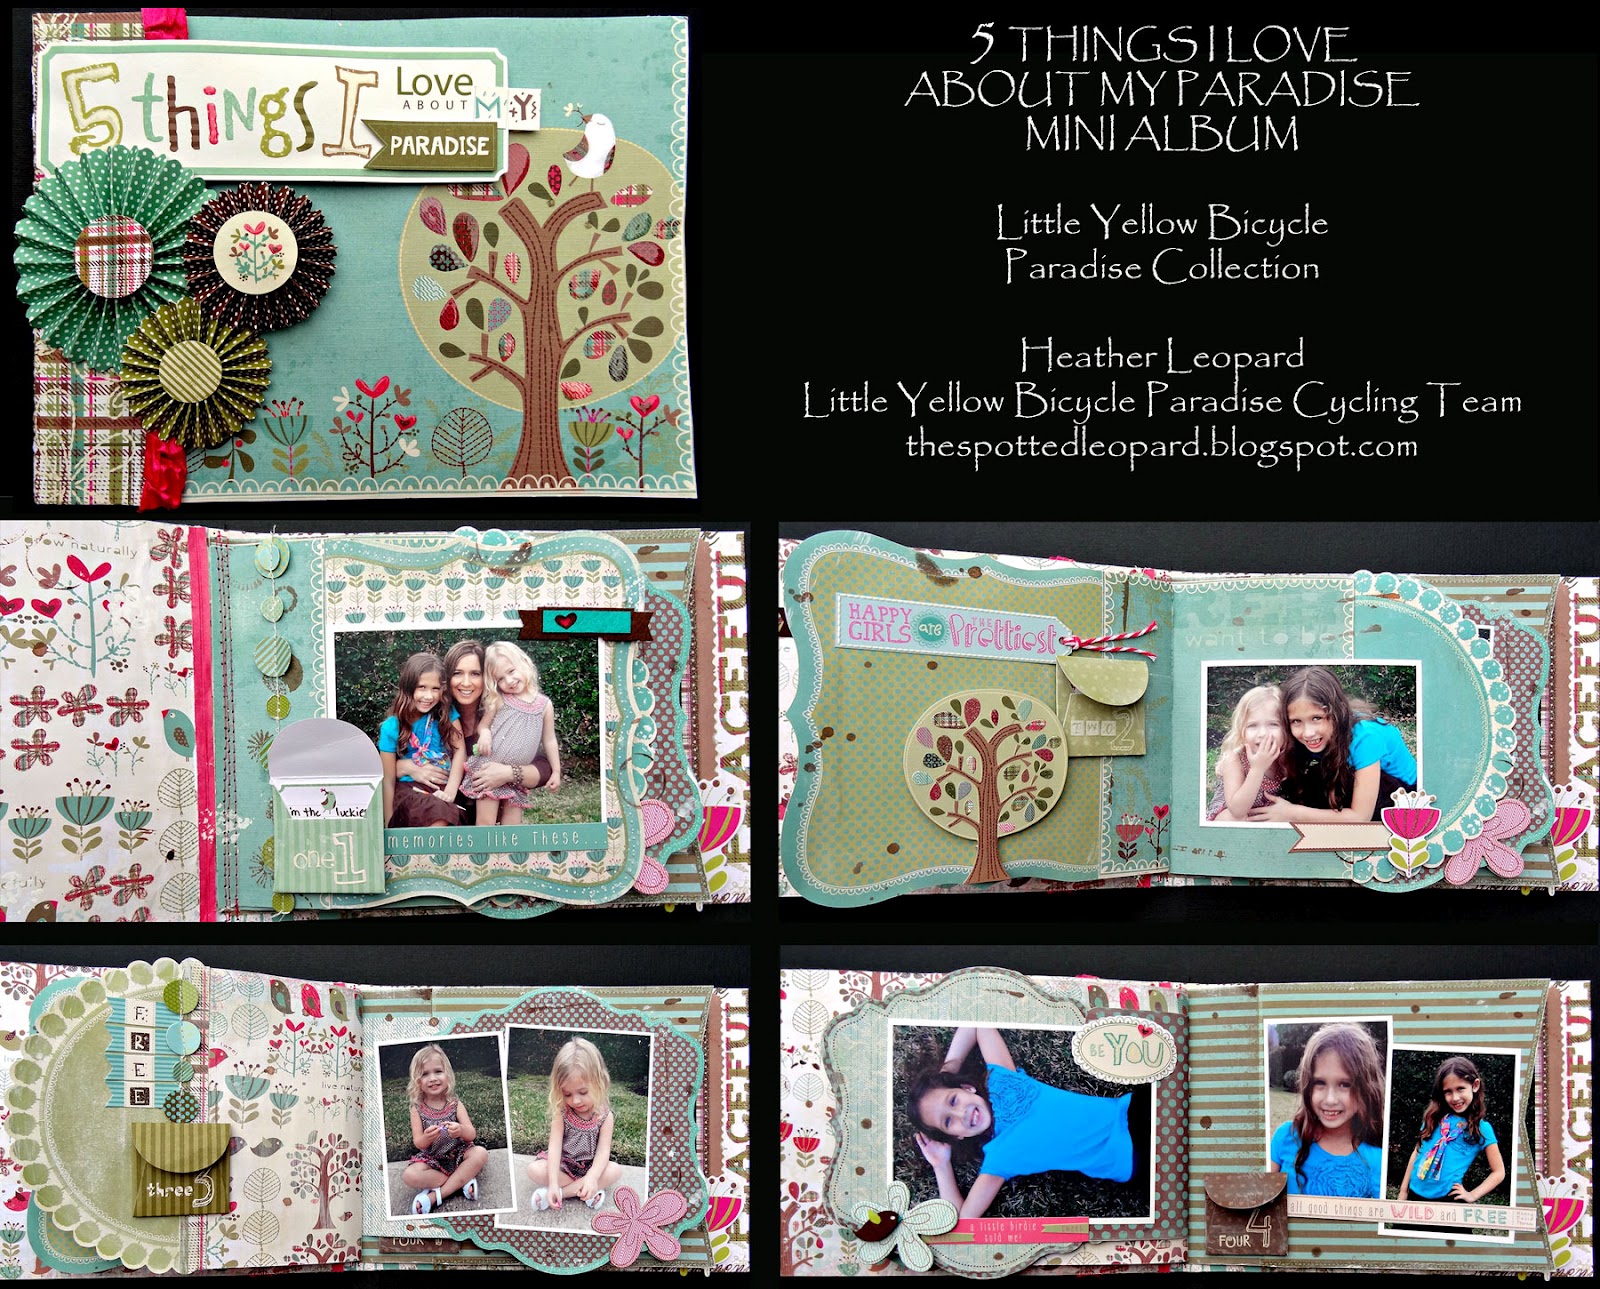
I am soo honored to be designing as a member of the Little Yellow Bicycle Paradise Cycling team.  When I saw the Paradise collection online all sorts of ideas came to mind and I was delighted to see how much more gorgeous it is in real life. Today I'm going to share a few layouts and a mini album, which I hope will inspire you. Beware, I've included lots of photos!

Sooo, the first thing I noticed when I pulled everything out were the die-cuts and I instantly realized how great they would be as a mini album.  I'll get to that in just a sec.  First, let me show you a few layouts I made.

For my first layout, I chose to use a photo of my daughter that is several years old. I'm not sure why I never scrapped it before but I'm glad because this is the perfect collection for it. Pin It


Supplies: American Crafts cardstock, Little Yellow Bicycle Paradise collection: PD-106 Happy Dots/All Natural, PD-108 Blissful Dots/Teal Tapestry, PD-133 6" x 6" Decorative Edge Double-sided Textured Cardstock - with glitter accents, PD-279 Chipboard Shapes - with glitter accents, PD-222 Felt Stickers - with glass beads, PD-305 Paper Flower Kit, PD-135 Cardstock Stickers - Favorite Pieces - with glitter accents, PD-140 Cardstock Stickers - Fresh Verse™ - with thermography and embossing, PD-1100 Tear Out Ticket Book - with thermography and embossing, Imaginisce i-top 2.0 and medium brad daddies, The Twinery twine, Zig Marker in Chocolate


I love to layer whenever possible.  I decided to triple layer my background but of course, I cut out the insides from the papers where they would be covered up so I could use them on another project. I distressed the edges just a bit and then machine stitched around the border.

Banners are still in-style and the "HAPPY" cardstock stickers did not dissapoint.
The paper flower kit is incredible.  I love the DIY rosettes, which come in 2 different sizes.  They add just the right touch to the layout.

My 2nd layout featured more banners, this time I cut them myself, using random widths and lengths and layering them over each other.  I also fussy cut a few of the papers, added some punch-work and then added a top and bottom "frame" to bring the layout together.
Pin It


Supplies:
American Crafts cardstock, American Crafts knock out border punch set, Little Yellow Bicycle Paradise collection: PD-109 Pleasant Plaid/Earthy Dots, PD-108 Blissful Dots/Teal Tapestry, PD-101 Paradise/Petite Pom Poms, PD-103 Simple Pleasures/Teal Too, PD-104 Splendid Stripe/Olive Leaves, PD-309 Confetti Garland - 30" long, Zig Marker in Chocolate


I did a zig-zag machine stitch over the banners at the top as well as on the main photo below to adhere them to the page and then topped them with garland for a litle bit of added flair. It's hard to tell in these photos but the circles are folded up randomly and I added a few smaller circles on top of the larger ones to make them even more interesting than they already are.

My last layout was taken last week as I caught my youngest daughter stopping to smell the roses.  She had  a very large velvet pen in her hand and she kept trying to smell it.  It was too adorable! This layout was made using leftover scraps after completing the other layouts and mini album.  I love that it pushed me to find creative uses for those odd shaped scraps.
Pin It

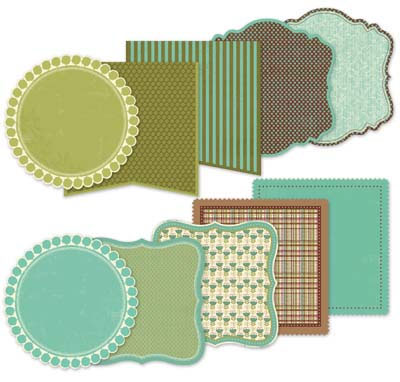
As promised, let's get back to the mini album.  Like I said, I saw the dies in their packaging and it just hit me how perfect they would work as-is for a mini.  Here's what they looked like in the packaging:

            
So the first thing I did was take them out of the packaging and cover the front and back of the actual packaging with pattern paper.  Here's how I started with the cover:
I then decorated the cover with cardstock stickers, DIY rosettes and Glossy Accents

Next I added coordinating paper to the dies, making sure to use a smaller width of paper for the first page, while adding more width to the next page and the next and so on so that the lengths of each page would get longer as they are added. Once I had all the base pages made, I stitched them together with my sewing machine, added mist and gesso and then added pictures and embellishments.  Here are the end result pages:
Pin It

 I just LOVE the little journaling pockets!


Supplies:

Little Yellow Bicycle Paradise collection: PD-133 6" x 6" Decorative Edge Double-sided Textured Cardstock - with glitter accents, PD-222 Felt Stickers - with glass beads, PD-230 Clear Cut Shapes, PD-308 5 Things Envelopes - self adhesive with embossing, PD-309 Confetti Garland, PD-140 Cardstock Stickers - Fresh Verse™ - with thermography and embossing, PD-279 Chipboard Shapes - with glitter accents  


Well I guess I hogged your time long enough. I hope you enjoyed browsing through my creations as much as I enjoyed playing with this new collection.  Be sure to stop by the Little Yellow Bicycle blog today and leave me some love over there too! xoxo Heather

Friday, February 3, 2012

Scrappn' Savvy "Love Struck" Blog Hop

Welcome to the first ever Scrappn' Savvy blog hop! Scrappn' Savvy is the LSS where I not only shop but teach.  During this blog hop, you will visit each instructors' website and see some wonderful projects featuring the We R Memory Keepers "Love Struck" collection. You must leave a comment at each blog, and then return back to the Scrappn' Savvy blog and leave a comment there that you have finished the hop. There will be some small prizes given away on each blog for a random commenter, and there will be one grand prize given away from all those comments left on the Scrappn' Savvy blog after you have finished the hop. The order of the blogs to visit is listed below. The hop will run until Sunday, Feb. 5th at midnight. Winners must go to the store to pick up their prize (sorry, no prizes will be shipped).

Here is a quick card that I created with the We R Memory Keepers "Love Struck" collection and the Imaginisce i-rock:

Now continue on with the hop and visit the next person in line! Once you have visited everyone's blog and left a comment, be sure to return to the Scrappn' Savvy blog and leave a comment that you have finished the hop!

Karen Burniston
Audrey Yeager
Carol Brown
Debra Hensley
Margene Beadroux
Heather Leopard <-- YOU ARE HERE!
Terri Burnette
Susan Mckinney
Leslie Parlette
Tove Mayer
Scrappn’ Savvy

Thanks for stopping by today. Please be sure to check out the Scrappn' Savvy online calendar to see upcoming events and classes.

Wednesday, February 1, 2012

Love You More & Snuggle Bug Kisses

I was uploading some layouts to various online galleries the other day when I realized there were a few layouts I created recently that I never posted here. Some are from older lines (gasp) and some are newer lines.  Here are two I created with older lines.  I'll post two from the newer lines in the next couple of days.

Snuggle Bug Kisses
The photos here were taken almost exactly two years a part.  My hubby was helping our oldest daughter get in a "better" mood for our family photo shoot and our fab photographer, Allison, was slyly clicking these shots capturing true family moments for us.  The photo of our youngest and her daddy was taken as he was holding her up in the air and giving nose kisses at the next year's photo shoot.  I absolutely love these real-life documented moments!
 Supplies: Bella Blvd Lovey Dovey collection; Imaginisce i-rock; CTMH flowers
Pin It

Up Close Shots
 I fussy cut some of the flowers and then machine stitched the stems. 
Pin It

Like you a lot. Love you more.
It's true...I like him a lot but I love him more. I had a lot of fun with paint, distressing, stitching and layering!
Pin It

Monday, January 16, 2012

BFF's, Accessory Friends and a Little Gift Bag

Who's  ready for a little Imaginisce release week fun?  This is the first reveal for the new team and I am soo excited for the new gals.  I'm still honored that they asked me to join the team again!!!  They just released a fun little collection called Sole Sisters that was the original brain child of Lori Allred (prior to her departure from Imaginisce) and included input from the 2011 Imaginisce team, including ME! While many of the elements she presented to the creative team weren't included, some of it is.  Here's a few things I created with the line...

Best Friends Forever layout - this is my daughter and one of her bff's playing outside in their princess dresses. This was a big step for my sensory child...she loves to dress up but she seldom gets the dresses on all the way and if she does they come off pretty quick. I hate that she struggles with playing dress-up or not because of this. What little girl doesn't want to dress up at some point in her life?  I mean every.single. princess dress on the market has an itch factor.  Seriously, if I were a princess I would demand some softer feeling fabrics. Luckily she has a crafty momma and two crafty grandma's who are making her some costumes! Until then, she wears soft clothes under the costumes or avoids it altogether.  Anyway, here's my layout about my daughter and her bff. She chooses to have only a few close friends (M, J, I and A) and I think that's just fine!
Pin It
Supplies: Imaginisce Sole Sisters collection - Shop Till You Drop, Girl Stuff, I Pick You papers, Picture This Canvas Stickers; Imaginisce i-rock, i-rock LED Lighted Tweezers, Pink Jewel Tray, pink, black and clear hot rocks; Imaginisce Colored Foam Tape - white; Bazzill White Cardstock, Pink Cardstock; Studio Calico Mr Huey mist in Bonny Blue; homemade mist in red; Tattered Angeld Chalkboard mist in Charcoal; Glue Arts Glue Glider Pro adhesive, Zig Pen - black .5mm, misc. thread

A small gift bag perfect for a gift card and/or other small items
Pin It
Supplies: Imaginisce Sole Sisters collection - Shop Till You Drop, I Pick You, Chic Chat papers, Girl Die-Cuts; Imaginisce i-rock, i-rock LED Lighted Tweezers, Pink Jewel Tray, red and teal hot rocks; Petal Roller, Imaginisce Colored Foam Tape - white; Cricut Once Upon A Time cartridge - < Gift Bag 3 > size 11x9.9, Glue Arts Glue Glider Pro adhesive, Tombow Liquid Adhesive; Fabri-tac, misc. ribbon


Card: FRIENDS are the best accesories - sooooo TRUE! Want to know a little secret? The red background is part of the collection but it's not in any of the papers or embellishments...it's part of the packaging!
Pin It
Supplies: Imaginisce Sole Sisters collection - Shop Till You Drop, Purse-onality, I Pick You, papers, packaging from the Note-orious Chipboard stickers, Girl Die-cuts; Imaginisce i-top 2.0, 16 mm punch and 16 mm brads; Imaginisce Colored Foam Tape - black; Bazzill Moonstruck Cardstock, Glue Arts Glue Glider Pro adhesive.


Thanks for stopping by today.  I hope you are leaving inspired! Make sure to head over to the Imaginisce blog and if you like my projects, leave me some love HERE and THERE!  I know they will be giving away a fabulous Sole Sisters package so be sure to check out the new collection and what some of the other designers did with it!

Sunday, January 15, 2012

It's Cookie Time

Yep, it's that time a year again. Time for the Girl Scouts to be out in full force knocking on doors and accosting you as you enter AND leave the store.  Well there's no avoiding it so you might as well order some from my little Brownie so she can earn a sleepover at the Aquarium!!!

We spent a couple of hours last week knocking on our neighbors' doors. We only made it down the cul-de-sac and over one small street and she sold 20 something boxes. Not too bad! I was so proud of her, politely asking, figuring out the check/cash/change thing and thanking them, whether they bought or did not buy. Yes, there was someone who turned her down but she just smiled and moved on. Of course I took pics of her doing her thing.
Pin It


I am just loving these Authentique papers included in this month's Birds of a Feather kit. I think Amy might have a few left! Thanks for stopping by today!

Thursday, January 12, 2012

They Better Run

Yep, all the boys that come around for our daughters had better know how to run FAST!  Bryan has always said from day 1 with our girls that he'll be polishing his shot guns when those boys come around... Well the other day, Rheagan was talking about Justin Bieber coming over and so on and so forth and her daddy promptly replied with "He Better Run!" I snapped these pics of her the next day and it only made sense to title and journal it about her daddy's love, adoration and protectiveness of her.
Supplies from Scrapbook Circle You + Me kit coming within an hour.
Pin It


This is made with the Scrapbook Circle You + Me kit and the last challenge for the Sketchy Thursdays challenge blog.  I am soooooo very sad to share this news.  You can read all about the decision and where you might find more of Heidi and Diana's sketches on the Sketchy Thursdays blog.  I just want to thank Heidi and Diana for all the work they put into make the site what it is and inviting me into the Sketchy Thursdays designer family. I feel like I have made lifelong friends with them, Julie and all the others I have designed with in my year and 2 months with them! I am a better designer because of all of them! {insert tears here}

So, let's see you playing along with the last official sketch on the blog.  It's a good one! Thanks for stopping by today!
xoxo Heather

Monday, January 9, 2012

A Bit of This & That Class - Altered Wooden Block

I started teaching a Tool School class at my LSS, Scrappn Savvy, last year. It all started at the request of the store owner, after finding out I am on the Imaginisce design team and we all know Imaginisce has phenomenal tools. It was a joint brainstorm to teach her customers how to use various tools out in the market. I held a couple of classes and did make-n-takes but make-n-takes aren't really my style because I am limited on what I can do under a very small budget.  So, starting this month I am now teaching a class called A Bit of This & That. I'll still use a variety of tools but since it's a class, I have more flexibility with what we are creating.

A Bit of This & That is exactly how it sounds – we’ll focus on something different each class – from layouts to mini albums, home décor, cards and more.  I am having my first class tonight and I just got a call from the owner asking me if we can increase the cap on the class because it is sold out!  

In tonight's class, I will show how a little block of wood, paint, distress, paper and a Melting Pot, can create you create a beautiful décor piece for display in a home, office or to give as a gift.  I'm using the My Mind’s Eye Lost and Found 2 Sunshine Forever & Sunshine Sunshine line & the Ranger Melt Art Melting Pot by Tim Holtz. I had so much fun playing with the Melting Pot, and today we're going to make glass-like pendants and beads. 

Here's the project we are making. 
Pin It


I encased my initial between the gorgeous paper and UTEE.  I also made the bead that you see in the top middle.  This melting pot is so fun to play around with! To make the perfect circle, I used cookie cutters and clay molds and poured the hot liquid into them. 

Come back on Thursday for a peek at February's class, which will include a single page layout, card and mini-mini album. I will also include ideas to make a 2nd page layout.

If you live in the Houston area I would love to see you at one of my classes. 

Thanks for stopping by today!

Friday, January 6, 2012

My Girl...and Her Dog

This month marks the end of my term on the Birds of a Feather design team.  It was great to be on Amy's inaugural team and the decision not to reapply was a hard one but I love the community over there so I'm not going anywhere.  If you've never seen her kits you should definitely check them out.  And this coming design team is sure to inspire you!

Here's a a couple of the layouts I've made from this kit. 
Supplies: Bo Bunny Double Dot "Chiffon Journal" and "Shitake", Authentique Gathering "Harmony", "Together", "Grow", "Bloom", Classic Type Alphas Item #SCC002; Making Memories “Paper Reverie Brun Antique” Lacy Stripe Artisan Die-cut paper; Kaiser Craft Fozz Fontz "Fonzo Alphabet Set" in Teal; Color-Me-Crazy Velvet Butterflies (misted bonny blue); Creative Impressions Twill - Caramel; Not in Kit - ADORNit Buckaroo alphas; Studio Calico Mr Huey Mists in 3 colors: Orchard, Pony, Bonny Blue; misc brown thread, Glue Arts Glue Glider Pro, Zig Marker .5 mm Black

The photo above was actually taken while my hubby and daughter were playing around.  We were on the hayride at the Pumpkin Patch and she was making crazy faces and he would just reach the camera out and click, not knowing if he was even getting her in the shot.  Most of them came out blurry but there were a few jewels in there.  This was one of them.

This next layout is of the day we met our new dog, Spot.  I was dead-set on adopting a dog that needed rescuing. I really owe the awareness of the importance of adoption to Pets Alive in NY, of which my favorite singer/songwriter, Rob Thomas and his wife, Marisol (and her family) support through volunteer work as well as through their Sidewalk Angels Foundation. I started following their Tweets (PA & SWA) and get their emails and it really took my heart.  So back to Spot, we found her on PetFinder.com.  We immediately fell in love with her (look at that face) and hoped that she was still available and also that she'd be a good fit for us. I love it that so many organizations post their animals (of all types) to it and you can look at most of those that are available for adoption and it takes you directly to the rescue facility. Spot came from Twyla's Friends and she was 7 months old when we got her.  She's such a wonderful little pup. She's a mix but I found lots of full bred babies and adult dogs (they need a home too) so the next time you are looking at adding a new "furr-ever" family member, please consider adopting!!!! Thanks for reading through my PSA!
Pin It
Supplies: Authentique Gathering "Harmony", "Together", "Grow", "Bloom", Classic Type Alphas Item #SCC002; Bo Bunny Double Dot "Shitake"; Kaiser Craft Fozz Fontz "Fonzo Alphabet Set" in Chocolate; Studio Calico Classic Calico Chip Shapes Assortment~Butterflies, Studio Calico "Classic Calico" Die-cut Cardstock Pieces - Tags; FabScraps Die-Cut Chipboard Embellishment – Fleur Frame; Clearsnap Smooch Pearlized Ink – Ocean Soul; Creative Impressions Twill - Caramel; Not in Kit - ADORNit Buckaroo alphas; Studio Calico Mr Huey Mists in Piglet & Orchard; My Little Shoebox small alphas pink(?), misc button; misc pink thread, Glue Arts Glue Glider Pro, Zig Marker .5 mm Chocolate


So apparently I was in a banner type state of mind when I put these together.  I know banners have been around a while but they're still "in", especially if you can find clever ways to mix it up.

Thanks for stopping by today!

Wednesday, January 4, 2012

The Power of Writing Down Goals...

I've been sitting here thinking about last year's scrappy goals and how this year will compare. What I am about to write is not meant to be boastful, but to hopefully inspire you to set/reach for your goals. When I set them last year I really didn't think they'd all happen (afterall, I can't control other people's decisions) but I was hopeful. For the first time ever, I decided to write them down and I think that really made all the difference.  Writing them down and keeping them in plain sight here at my scrappy desk really helped me navigate and focus on what I wanted to accomplish.  I never really set goals like this before but now I can see how important it can really be.

My 2011 Goals:
  • Make a manufacturer design team - thank you Imaginisce & Lori Allred. For the record, there were teams I tried for and did not make as well.
  • Design for a kit club - have you seen the kits from Scrapbook Circle and Birds of a Feather?
  • Become a Sketchy Thursdays design team member - I have loved getting to know the team and players this past year!
  • Get published in an online magazine - Thank you ScrapStreet.com & Scrapbook News & Review
  • I didn't write this one down, thinking I'd save it 'til 2012 but it was in the back of my head - High aspiration goal to get published in a print magazine - See page 14 of Creating Keepsakes January 2012, picked up mid-2011. 
  • I even accomplished a few things that weren't on my list - other great challenge blog design teams like The Studio and a guest designer spot for a new manufacturer, Simple Stories, etc.
  • Make new scrappy friends and grow bonds with my "old" friends - see my blog roll to the left.
 
So here I sit pondering this year's scrappy goals. I don't have them all ironed out yet but I'll share a few:
  • Make a new manu design team and/or secure guest spots; submit projects to be "spotted" 
  • Participate in more online challenges
  • Take a photography class to get off auto mode; maybe a scrappy one too
  • Get published in at least two leading print publications - must remember that I have to actually submit my work in order to meet this goal!
  • Take a photo a day - Project 365
  • Q&A sessions with each member of the family
  • Participate in Project Life or Project 12
  • Hoard less, giveaway more...
  • Do more, faster so I can have more time to make memories with my family! This is the most important of all - more time with the family!
What are some of your goals? Leave me a comment or link me to your blog so I can read about your plans for 2012. As I clean out my scraproom I might just find some scrapilicious goodies for a RAK.

Before you go, I meant to post my "Best of 2011" projects on New Year's Day but better late than never, right? Here's a few of my FAVES in no particular order. Click to Enlarge.


Thanks for stopping by today.  Don't forget to share your 2012 plans in my comments! I'm going to sit down with my family and do this exercise as well. I think it will be a great learning experience for us all. When doing it with the kids, I add some short term goals in with a long term goal because I think we all know 1 year is a long time to the kiddos.