Hello fabulous friends. I am here today, sharing a lemonade scrapbooking layout that features a super-sized title of a proverbial phrase we all know and love. It's meant to provide optimism but I'm using it in the literal sense 'cause it's just too good to pass up for this lemonade stand layout.
I also wanted to create a quilt-like lemon as part of the title to make it "pop" and add a bit more interest to the page. Let's see how it all came together.
I like to sketch my projects out, either in a sketch book or digitally. When I'm working on my computer or I know I am going to be using my Silhouette, I use the Silhouette software to sketch it all out. I actually draw boxes for photos and layers to make sure everything will fit perfectly before I cut it out. It also serves as a great guide to creating the actual layout once everything is cut.
Once I knew how much space I had to work with, I trimmed down the cardstock and adhered it over the background. But first, I cut out the inside of the background patterned paper because I just can't let anything go to waste! Now it was time for a little stitching with the sewing machine and I was set to go.
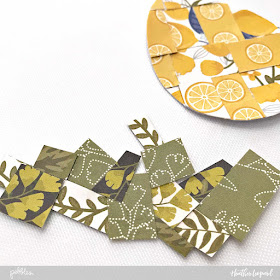
As mentioned previously, I wanted to create the patchwork quilt-like feel for the lemon. To accomplish this, I cut the lemon shape out of cardstock. Next, I adhered small squares randomly over the top and set aside to dry. Once dry, I trimmed the overage to reveal a lemon shape.
Repeat the process for the leaf.....
Next, it was time for the large title. I cut letters out of six different patterned papers. I actually cut the same exact letters from the different papers. Then I randomly placed them, making sure that no two were too close to each other. While this wastes a bit of paper, I wanted flexibility to change patterns as needed.
Once I liked the placement, I adhered them with liquid adhesive and added my super-sized lemonade word. "Lem" and "nade" where also adhered with liquid adhesive. I placed the lemon shaped "o" in the middle using foam for dimension.
I added photos, embellishments, and the oh so important journaling to complete the page. With that I ask, who's ready for some lemonade, or better yet, who's ready for some lemonade scrapbooking?
Supplies: Jen Hadfield Simple Life 12x12 Patterned Paper - Barnwood (733480), Jen Hadfield Simple Life 12x12 Patterned Paper - Sweet Citrus (733483), Jen Hadfield Simple Life 12x12 Patterned Paper - Spring Seeds (733467), Jen Hadfield Simple Life 12x12 Patterned Paper - Growing Floral (733472), Jen Hadfield Simple Life 12x12 Patterned Paper - Leafy Sprigs (733485), Jen Hadfield Simple Life 12x12 Patterned Paper - Music (733476), Jen Hadfield Simple Life 12x12 Patterned Paper - Bougainvillea (733479), Jen Hadfield Simple Life Cardstock Stickers 5.5″x 11″ Icons & Accents (732487)


